Best Fly Tying Kits Reviewed: Top Picks for Beginners
Affiliate disclosure: Some links on this page are affiliate links. If you buy through them we earn a small commission at no extra cost to you. Recommendations are research-driven; we don't claim personal use of every product reviewed. Product prices and availability are accurate as of the date published and are subject to change. Always check Amazon for current pricing before purchasing. Learn more.
Quick Picks
Orvis Fly Tying Kit for Beginners
Complete starter kit from a trusted brand , everything needed to tie first flies
Scientific Anglers Fly Tying Kit
Complete starter package from one of fly fishing's most trusted brands
Buy on AmazonRenzetti Traveler Fly Tying Vise
The benchmark mid-tier fly tying vise , recommended by guides and instructors worldwide
Buy on Amazon| Product | Price Range | Top Strength | Key Weakness | Buy |
|---|---|---|---|---|
| Orvis Fly Tying Kit for Beginners best overall | $ | Complete starter kit from a trusted brand , everything needed to tie first flies | Budget vise included , will be replaced when tying skills develop | — |
| Scientific Anglers Fly Tying Kit also consider | $ | Complete starter package from one of fly fishing's most trusted brands | Budget vise is the weakest component , upgrade first as skills develop | Buy on Amazon |
| Renzetti Traveler Fly Tying Vise also consider | $$ | The benchmark mid-tier fly tying vise , recommended by guides and instructors worldwide | Research-based , Greg owns Nor-Vise for his primary tying | Buy on Amazon |
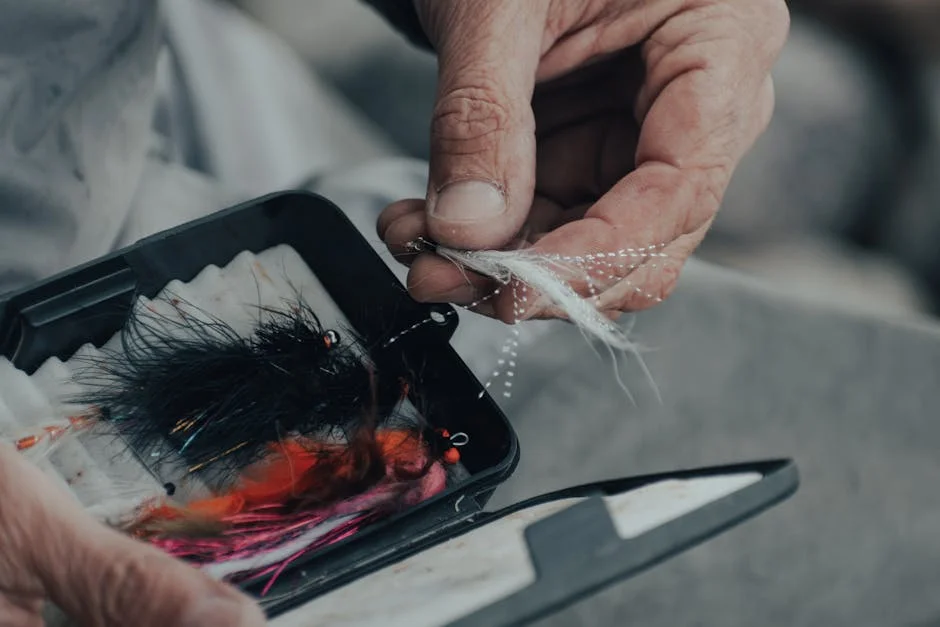
Fly tying sits at the edge of fly fishing obsession , the point where buying flies isn’t enough and you need to understand how they’re built. The materials are simple, the techniques are learnable, and the connection between tying bench and river is direct. A good fly tying setup gets you to your first acceptable fly faster than you’d expect. A poor one creates frustration that has nothing to do with skill.
The gap between a productive tying session and a frustrating one usually comes down to two things: whether your vise holds the hook securely, and whether your materials are appropriate for the patterns you’re learning. Everything else is secondary.
What to Look For in a Fly Tying Kit
Vise Quality , The Component That Matters Most
The vise is the foundation of every tying session. A vise that slips, wobbles, or fails to hold small hooks consistently will undermine your technique before you develop it. Budget kits almost always include budget vises, and that’s a real limitation , not a dealbreaker for a beginner’s first fifty sessions, but something to plan for.
The two vise mounting styles are clamp and pedestal. Clamp mounts attach to a table edge and offer better stability for applying thread tension. Pedestal mounts are portable and don’t require a dedicated tying surface. Most serious tyers eventually prefer clamp mounts for home use. For a first kit, either works , focus on jaw grip strength and hook size range.
Rotary vises allow the hook to spin on a true axis, which speeds up thread and material wraps on bodied flies considerably. The Renzetti Traveler is the most recommended rotary vise at a mid-tier price. True rotary function isn’t necessary to learn the basics, but once you’ve used it, returning to a non-rotary setup feels slow.
Material Quality and Pattern Coverage
Starter kits include a curated selection of thread, hooks, dubbing, feathers, and wire. The question is whether the included materials actually cover the patterns a beginning fly tyer will want to tie. Trout pattern staples , the Pheasant Tail, Hare’s Ear, Elk Hair Caddis, Adams, Woolly Bugger , require specific materials, and not every budget kit covers all of them.
Material quality in starter kits is serviceable, not exceptional. The thread is usually adequate. The hooks are generally functional, though serious tyers will upgrade to Tiemco or Daiichi hooks relatively quickly. The biggest variable is dubbing , cheap dubbing doesn’t blend or apply the way quality dubbing does, and this shows immediately on nymph bodies.
A kit that covers three or four foundational patterns well is more valuable than one that nominally covers eight patterns with thin material depth. Orvis and Scientific Anglers both curate their kits toward the most-tied trout patterns, which is the right approach for beginners.
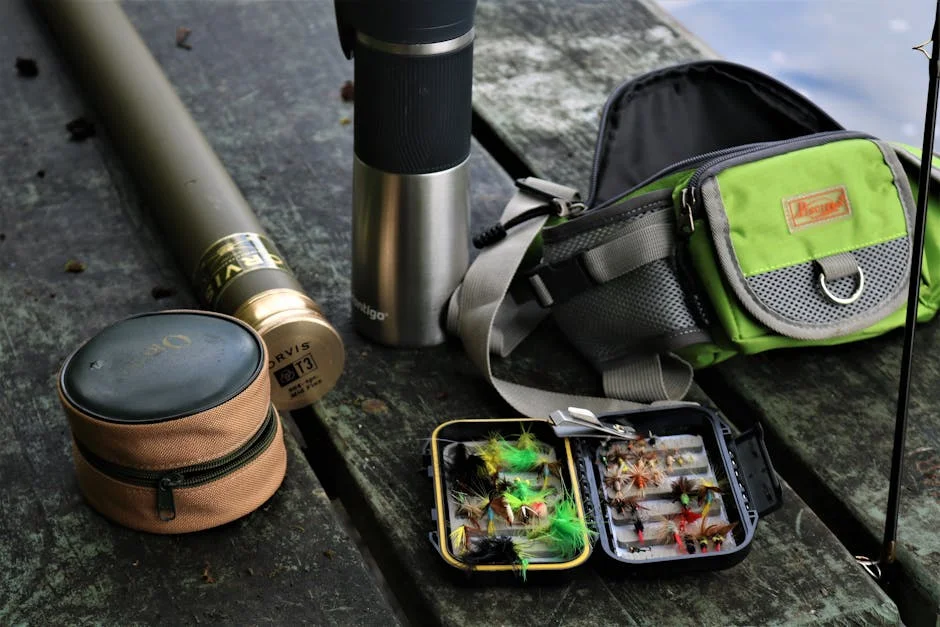
Tools , What You Need First
Every tying kit includes bobbin, scissors, whip finisher, bodkin, and hackle pliers. These tools are adequate for learning and will carry you through hundreds of sessions if treated well. The scissors in budget kits are usually the first upgrade , precision tying scissors from Dr. Slick or Anvil cost little and make a real difference in thread and material control.
The bobbin is the tool beginners struggle with most. Thread tension, tube diameter, and how the bobbin tracks during a wrap all affect the smoothness of thread application. Starter kit bobbins work. They’re not precise instruments. That’s appropriate for the learning phase.
Don’t accumulate tools before you can use the basic set well. One bobbin, one pair of scissors, and consistent practice with those two tools will build the foundation everything else depends on. Exploring the full range of fly tying tools before you’ve developed thread control is how you end up with equipment you can’t use yet.
Learning Curve and Pattern Selection
Start with the simplest possible flies. The Copper John is one material and a hook , it teaches proportional body building and bead application. The Pheasant Tail is three materials and teaches tailing, ribbing, and wing case. The Woolly Bugger introduces the chenille body and palmered hackle. These three patterns, tied acceptably, will catch fish on most trout water in the country.
The common beginner mistake is reaching for complex patterns before thread control is consistent. Smooth, even thread wraps are the foundation of every fly, and they take more practice than most new tyers expect. The first twenty sessions should be heavily weighted toward simple patterns and repetition , not variety.
Top Picks
Orvis Fly Tying Kit for Beginners
The Orvis Fly Tying Kit for Beginners is the strongest brand endorsement in the beginner category. Orvis’s curation of materials reflects decades of guiding anglers toward the patterns that actually produce fish, and that shows in what’s included. The tools are basic but functional. The materials cover the foundational trout patterns without excess.
The vise is a clamp-mount budget model , serviceable for learning, not a long-term instrument. Plan to replace it when your thread control becomes consistent enough that jaw grip becomes a limiting factor. That transition might be six months in, might be eighteen , it depends how often you tie.
This kit works well as a gift for an angler who’s expressed interest in tying their own flies. The Orvis name carries weight with new tyers, and the curated material selection means a beginner isn’t immediately lost wondering what to do with what they have. Owner reviews consistently cite the completeness of the kit as its primary strength , everything needed to tie the first ten sessions is in the box.
Check current price on Amazon.
Scientific Anglers Fly Tying Kit
The Scientific Anglers Fly Tying Kit approaches the beginner category from a brand with deep credibility in fly fishing. Scientific Anglers built its reputation on fly lines, but the material curation in this kit reflects genuine understanding of which patterns beginning trout tyers should learn first. The included materials target the Woolly Bugger, Hare’s Ear, and basic dry fly patterns , the right starting point.
The vise is the same limitation as every other budget kit. SA doesn’t solve the vise problem , no kit at this price point does. Budget accordingly and treat the vise as a learning tool rather than a permanent instrument.
Compared directly to the Orvis kit, the SA kit is a near-equivalent at a comparable price. The material selection is slightly different; neither is clearly superior. The decision between them often comes down to which brand has more meaning to the buyer or recipient. For a beginner tyer without a strong brand preference, either is a sound starting point. Owner feedback notes the SA kit’s material organization as a strength , materials arrive sorted in a way that makes the first session less confusing.
Check current price on Amazon.
Renzetti Traveler Fly Tying Vise
The Renzetti Traveler is the vise that appears on more recommended lists from guides, instructors, and experienced tyers than any other mid-tier option. That consensus is earned. The true rotary function works correctly , the hook spins on a genuine axis, which means thread wraps and material applications on bodied flies go faster and more evenly than any non-rotary vise will allow.
The rotary feature isn’t a learning aid for beginners , it’s a productivity tool for tyers who already have thread control. The argument for buying the Traveler as a first vise rather than upgrading later is straightforward: the cost difference between a budget kit vise and the Traveler is less significant than the time spent learning on a tool you’ll replace anyway. Verified buyers and shop recommendations consistently land on this logic.
The Traveler holds hooks from size 28 midge patterns up through large streamer hooks with reliable jaw grip. The construction is the kind that lasts , Renzetti vises are routinely passed down between generations of fly tyers. The weak point, relative to higher-end vises, is jaw flexibility for very large or oddly-shaped hooks. For the patterns most tyers tie most of the time, that limitation never surfaces.
Check current price on Amazon.
Buying Guide
Starter Kit Versus Component Purchase
The case for buying a starter kit rather than assembling components is simple: a curated kit prevents the mistake of accumulating materials before you know what you need. The classic beginner error is buying a massive materials haul , every feather, every dubbing color, every thread weight , before developing the thread control that makes those materials usable. A starter kit limits the blast radius of that impulse.
The case against kits is equally clear. The vise is always the weakest component, and the tools are adequate rather than good. A buyer who’s already confident they’ll stick with tying might be better served by a standalone mid-tier vise and a modest first material purchase. The math favors this approach if tying becomes a long-term habit.
For most beginners, the kit is the right starting point. Replace the vise when your skills outpace it.
Vise Investment , When to Upgrade
The question of when to upgrade from a budget vise has a practical answer: when you notice the jaw slipping during thread tension, or when you’ve tied enough that rotary function would meaningfully speed up your sessions. For most tyers, this happens somewhere between fifty and two hundred hours of bench time.
The Renzetti Traveler is the upgrade that shop recommendations and online consensus consistently point to. It handles the full range of hook sizes that most trout tyers encounter, and the rotary function changes the rhythm of tying sessions in a way that’s difficult to articulate until you’ve used it. Buying it earlier rather than later is usually the better financial decision.
A mid-tier vise purchased once will outlast multiple budget vises and dozens of tying seasons. The cost-per-session math favors quality early.
Material Acquisition , Less Is More
The instinct when starting to tie is to buy everything. Every dubbing color, every feather type, every hook size. This is the wrong approach. The right approach is to identify two or three patterns and buy materials for those patterns specifically , then tie those patterns until they’re consistent before expanding.
A Pheasant Tail requires pheasant tail feathers, copper wire, and thread. A Woolly Bugger requires marabou, chenille, hackle, and thread. A Hare’s Ear requires hare’s ear dubbing, pheasant tail, and wire. These three patterns cover the majority of trout fishing situations on moving water. Their material requirements overlap, which means a small initial investment covers real versatility.
Expanding the material collection should follow demonstrated need , specific patterns for specific hatches, specific water conditions. The fly tying resources available online and in print make pattern-specific material lists easy to find. Use those lists rather than buying speculatively.
The Real Value Proposition in Tying Your Own Flies
Fly tying saves money only if you tie in volume and fish what you tie. Most casual tyers produce more flies than they use, and the materials cost doesn’t justify the bench time on a pure financial basis. The honest case for tying your own flies is different , it’s an education in fly design.
Tying two hundred Pheasant Tails teaches you why body taper and fiber count matter. Tying the Adams teaches you why hackle fiber length changes how the fly sits on the surface film. That understanding changes how you fish , you read the water differently when you understand the mechanics of the fly presentation you’re making.
The productive frame for tying isn’t cost savings. It’s comprehension. The tyers who stick with it long-term are almost always the ones who found the bench work interesting in itself , not the ones who were primarily trying to reduce their fly budget.
Matching Kit to Intended Use
The Orvis and SA kits both target the same buyer: a beginner tyer who fishes trout water and wants to learn the foundational patterns. Neither kit is appropriate for saltwater tyers, warmwater species, or large streamer fishing , the materials and hook sizes don’t cover those patterns adequately.
A buyer purchasing a kit as a gift should match the kit to the recipient’s primary fishing. A Great Lakes steelhead angler needs different materials than a Colorado tailwater nymph fisher. When in doubt, a mid-tier vise as a standalone gift is more universally useful than a materials-inclusive starter kit , the recipient can source their own materials for the patterns they actually fish.
Frequently Asked Questions
What’s the difference between the Orvis and Scientific Anglers starter kits?
Both kits target beginning trout fly tyers and include a budget vise, basic tools, and materials for foundational patterns. The material selection differs slightly , the Orvis kit leans on the brand’s longtime retail presence in fly tying education, while the SA kit reflects Scientific Anglers’ deep trout fishing background. Neither is clearly superior. The decision usually comes down to brand familiarity or which is available at a better price on a given day.
Should I buy a starter kit or purchase a good vise separately?
If you’re genuinely uncertain whether fly tying will hold your interest past the first month, a starter kit limits the financial risk while giving you everything needed to find out. If you’re already committed to tying long-term, buying the Renzetti Traveler as your first vise and sourcing materials separately is the smarter investment , you’ll replace a budget vise eventually anyway, and buying quality once is less expensive than buying twice.
Is the Renzetti Traveler appropriate for a beginner?
The Renzetti Traveler is used by beginners and professionals alike , the vise doesn’t limit or accelerate the learning curve, it simply performs consistently without introducing the grip and stability problems that budget vises create. A beginner who buys the Traveler will use it for decades. The rotary function becomes useful once thread control is developed enough to take advantage of it. There’s no advantage to starting on a lesser vise.
What flies should I tie first as a beginner?
Start with the simplest possible patterns , the Copper John, the Pheasant Tail, and the Woolly Bugger cover three distinct fly types and teach the core skills. The Copper John teaches proportional body building and bead application. The Pheasant Tail introduces tailing, ribbing, and wing case. The Woolly Bugger adds palmered hackle and chenille body.
Do fly tying kits include everything needed to start tying immediately?
The Orvis and SA kits include a vise, a complete basic tool set, and materials for several foundational patterns , enough to sit down and begin tying the same day. They don’t include an instruction book or video access, though both brands provide tying resources online. The missing element in most starter kits is pattern-specific guidance: knowing which included materials go toward which fly is knowledge you’ll need to source separately through YouTube tutorials or a local fly shop.