Norvise Apprentice Review: 15 Years of Rotary Vise Performance
Affiliate disclosure: Some links on this page are affiliate links. If you buy through them we earn a small commission at no extra cost to you. Recommendations are research-driven; we don't claim personal use of every product reviewed. Product prices and availability are accurate as of the date published and are subject to change. Always check Amazon for current pricing before purchasing. Learn more.
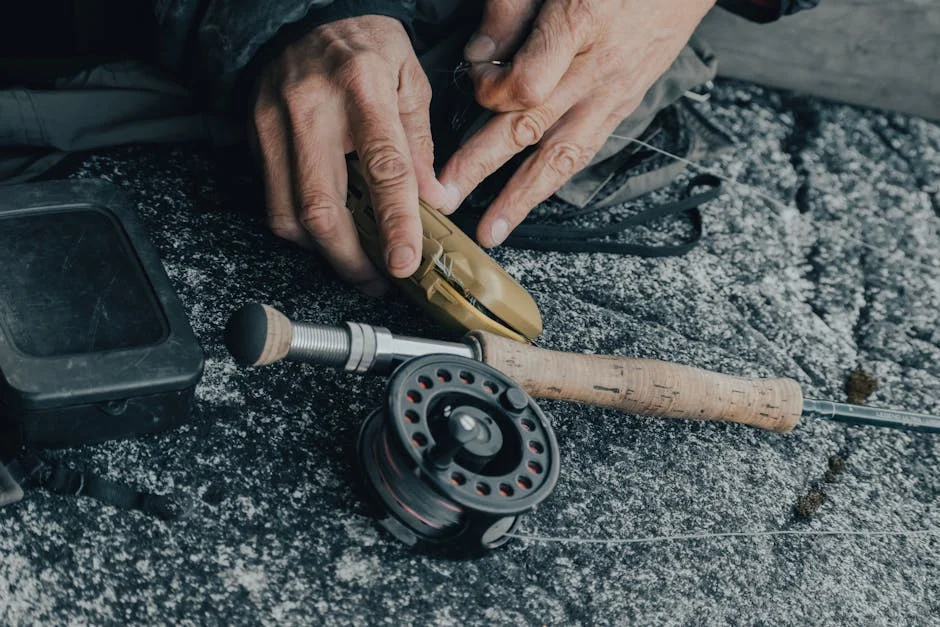
Greg's vise for over a decade , true rotary function is genuinely useful for palmering hackle and dubbing bodies
Fifteen years on the Norvise , and the vise I tie on today is the same one I bought after a guide told me it would change how I approach thread work. He was right, and I’ve never had reason to look elsewhere. This review covers what the Nor-Vise Apprentice actually does well, where the learning curve is real, and whether it belongs in your tying room.
The Nor-Vise system is distinct enough from a Renzetti or Regal that it deserves honest treatment, not a quick spec rundown. If you’re serious about fly tying and want a rotary vise built to last decades, read on.
What to Look For in a Rotary Fly Tying Vise
True Rotary vs. Rotary-Style Function
The most important distinction in vise selection is often the least understood. A “rotary-style” vise rotates but doesn’t hold the hook on a consistent axis , meaning the hook drifts off-center as you spin. A true rotary vise keeps the hook point precisely on the axis of rotation so you can wrap materials by spinning the vise rather than rotating your hands around the hook.
For most thread-and-hook work, the difference doesn’t matter. The moment you’re palmering hackle on a Wooly Bugger or building a dubbing body on a larger fly, it matters enormously. Verified buyers and experienced tyers consistently note that once you’ve palmered hackle on a true rotary vise, going back feels like tying with one hand.
Jaw Design and Hook Range
A vise jaw that handles a size 2 streamer hook but fails on a size 20 midge is not a versatile tool. The jaw geometry determines how securely hooks are held, how much of the hook bend is exposed, and whether you can work close-in on small patterns without the jaw blocking your thread path.
Cam-action jaws (common in Renzetti and similar designs) clamp with a single lever motion. Collet-style jaws (common in Regal and related designs) use spring tension. Neither is universally superior , the question is how consistently the jaw holds at the extremes of your hook range, and whether it holds the same hook on the same axis across a long tying session.
Pedestal vs. C-Clamp Mount
The mount decision is mostly about your tying environment and rarely reconsidered once made. A pedestal base offers portability and works on any surface without damaging the edge. A C-clamp mount anchors the vise firmly to a dedicated bench and eliminates any movement under load.
Tyers who travel to classes, swap meets, or tie at a club favor the pedestal. Tyers with a permanent bench often prefer the clamp for stability. Some vises offer both options. Exploring the full range of vise mounting options in fly tying before you commit to a bench setup is worth the time , the decision is harder to reverse once your tying space is organized around it.
Material Finish and Durability
A vise is a long-horizon purchase. The best ones outlast their owners. Material quality , stainless or hardened steel, machined aluminum, quality chrome plating , determines how a vise performs after a decade of use, not just out of the box.
Chrome-plated zinc or pot-metal construction looks equivalent in a product photo but shows wear within a few years. Machined steel or hardened aluminum maintains jaw tolerance over time. Owner reviews from tyers who have used a vise for five or more years are more reliable than first-month impressions , look for long-term accounts, not just unboxing reactions.
Top Picks
Nor-Vise Apprentice Fly Tying Vise
The Nor-Vise Apprentice is not a beginner vise despite the name. It’s the entry point into the Nor-Vise system , a purpose-built rotary design that operates differently from any other vise on the market, and which rewards the tyer willing to spend time learning how it works.
The true rotary function is the headline feature, and it earns its reputation. Owner reviews and community field reports consistently point to the same experience: the first time you palm hackle on a Wooly Bugger by spinning the vise rather than winding your hands around the hook, the advantage is immediately obvious. Thread tension stays consistent, material distribution is even, and flies that used to take twelve minutes take eight. That efficiency compounds over a full tying session.
The Nor-Vise system extends beyond the vise head itself. The bobbin design and thread-tension mechanism are unique to this brand , and this is where the learning curve lives. The tension setup feels different from a standard ceramic-tip bobbin. Verified buyers with backgrounds on other vises almost universally note an adjustment period. The tension consistency, once dialed in, is better than most alternatives. But “once dialed in” is the operative phrase. Budget several sessions for setup calibration before judging the system on feel alone.
Construction quality is the other distinguishing factor. The Apprentice is built to last decades. Tyers who have owned theirs for ten, fifteen, even twenty years report the same jaw tolerances they started with. The Nor-Vise is the kind of tool you buy once if you buy it at the right point in your tying development , and it’s the vise the overlanding and field community points to when the question is “what do you wish you’d bought first?”
The honest caveat: the premium price is real, and the true rotary feature is something a beginning tyer may not exploit for years. Owner consensus consistently reflects this , experienced tyers who understand what rotary function actually does call it worth every dollar. Tyers who buy it as a first vise sometimes find themselves on a -plus learning curve for features they won’t use until year three. The Nor-Vise Apprentice is the right vise for an intermediate-to-advanced tyer who ties in volume, palmers hackle on larger patterns, and wants a tool that will still be performing correctly in fifteen years.
Check current price on Amazon.
Buying Guide
Matching Vise to Tying Stage
The most common buying mistake in fly tying vises is purchasing for the tyer you want to be rather than the tyer you are. A true rotary vise at the Nor-Vise level is genuinely useful , but only if you’re tying patterns that exploit rotary function and doing it consistently. If your current rotation is Elk Hair Caddis, Parachute Adams, and the occasional Copper John, a premium rotary vise won’t change your flies.
The honest benchmark: if you tie more than 150 flies per season, tie complex bodied flies (Wooly Buggers, Hare’s Ears, Soft Hackles), and plan to keep tying for the long term, the investment in a premium rotary vise starts making sense. Below that volume and complexity level, the marginal gain shrinks.
Understanding the Nor-Vise System Before You Buy
The Nor-Vise is not a drop-in replacement for a Renzetti or a Regal. The bobbin system, the thread-tension mechanism, and the overall workflow are specific to this design. Tyers who approach it expecting a standard setup will have a frustrating first week.
The right preparation: watch the Nor-Vise instructional content before your first session. Plan for an adjustment period. Tie simple flies , a thread-body nymph, a basic soft hackle , until the tension feel is familiar before moving to complex patterns. The system rewards patience. The tyers who dismiss it after two sessions are typically the ones who didn’t account for the learning curve.
Resources in the broader fly tying community , forum threads, YouTube walkthroughs from long-term Nor-Vise owners , are worth finding before you commit. The community knowledge base around this vise is substantial.
Rotary Function in Practice
True rotary tying changes the mechanics of building a body on a hook. The hook stays on axis, materials wrap evenly, and the tyer’s hands move less. For palmering hackle on a size 4 Wooly Bugger, the efficiency gain is significant. For tying a size 18 Blue Winged Olive, rotary function is mostly irrelevant , the fly is tied in so few thread turns that spinning the vise adds nothing.
Know your primary patterns. If streamers and large nymphs dominate your box, the rotary function will earn its keep quickly. If you tie primarily small dries, the premium for true rotary is harder to justify on functional grounds alone.
The Cost of Tying Accurately Understood
Tying your own flies saves money only under specific conditions: you tie in volume, you fish what you tie, and you don’t account for your time. Most casual tyers , including the author of this review for the first several years , tie more than they fish, accumulate materials they never use, and would spend less buying flies from a shop.
The real case for tying isn’t the cost math. It’s the education. After 200 Pheasant Tails, you understand why fiber count and body taper matter. After 100 Adams variants, you understand how hackle fiber length changes how the fly sits on the film. Tying is how you learn fly design , and a vise at the Norvise level is part of a serious long-term commitment to that education, not a shortcut to cheap flies.
Frequently Asked Questions
Is the Nor-Vise Apprentice suitable for beginners?
The short answer is no , not as a first vise. The Nor-Vise system has a distinct learning curve, and a beginning tyer is better served by a simpler jaw design while building foundational thread skills. The Apprentice makes more sense after a tyer has two or three seasons of basic pattern work behind them and understands what rotary function actually does in practice. Owner reports consistently support this sequencing.
How does the Nor-Vise differ from a Renzetti or Regal?
The Renzetti Traveler and Regal Medallion are both capable rotary vises with different jaw designs and well-established user communities. The key difference with the Nor-Vise is the complete system: a proprietary bobbin and thread-tension mechanism that works with the rotary function in a way the other brands don’t replicate. Verified buyers who’ve used all three consistently note that the Nor-Vise thread tension, once calibrated, is more consistent , but that calibration takes longer to master than either alternative.
What hook sizes does the Nor-Vise Apprentice handle?
The Apprentice handles a wide range , from large streamer hooks down to small midge and dry fly hooks in the size 18, 20 range. Owner reports note it performs well across most standard trout hook sizes. Tyers working primarily in sizes 22 and smaller may encounter some limitation at the extreme small end, though this varies with hook wire diameter. For the Colorado tailwater range of size 14 to 20, the jaw coverage is solid.
How long does it take to learn the Nor-Vise system?
Most tyers with prior vise experience report a two-to-four-session adjustment period before the tension setup feels natural. Tyers coming from a collet-style vise (Regal-style spring tension) tend to find the transition faster. The Nor-Vise instructional materials cover the setup in detail, and the community of long-term owners is active and helpful. Plan for several sessions of simple flies before moving to complex patterns.
Is the Nor-Vise Apprentice worth the premium price?
For intermediate-to-advanced tyers who tie in volume and work complex palmered or dubbed-body patterns, the owner consensus is clearly yes. The construction quality means the vise will perform identically in fifteen years as it does today , which amortizes the cost significantly over time. For tyers at the early stages who tie fewer than 100 flies a season, the premium is harder to justify. The Nor-Vise Apprentice earns its price at a specific point in a tyer’s development, not universally.
Nor-Vise Apprentice Fly Tying Vise: Pros & Cons
- Greg's vise for over a decade , true rotary function is genuinely useful for palmering hackle and dubbing bodies
- Nor-Vise's system includes the bobbin and thread-tension setup unique to this brand
- Learning curve on the Nor-Vise system , different feel from Renzetti or Regal