Fly Fishing Photography: Master Streamside Photography Skills
Affiliate disclosure: Some links on this page are affiliate links. If you buy through them we earn a small commission at no extra cost to you. Recommendations are research-driven; we don't claim personal use of every product reviewed. Product prices and availability are accurate as of the date published and are subject to change. Always check Amazon for current pricing before purchasing. Learn more.
Quick Picks
| Product | Price Range | Top Strength | Key Weakness | Buy |
|---|---|---|---|---|
| Flywater: Fly-Fishing Rivers of the West also consider | $$ | Buy on Amazon | ||
| Fifty Places to Fly Fish Before You Die also consider | $$ | Buy on Amazon |
Fly fishing and photography share an uncomfortable truth: both look easier than they are, and both reward patience, positioning, and knowing what you’re actually trying to capture. After twenty years on the water, I’ve watched a lot of anglers pull out their phones streamside and get nothing worth keeping. I’ve done the same thing myself.
The good news is that fly fishing photography doesn’t require a professional camera setup or a cinematographer’s eye. It requires understanding a handful of principles that apply whether you’re shooting on a Colorado tailwater in December or wading a Montana freestone in July.
Why Fly Fishing Photography Is Different From Other Outdoor Photography
Most outdoor photography gives you a subject that’s reasonably cooperative. A mountain doesn’t move. A wildflower holds still. Fly fishing photography stacks variables on top of variables: moving water, moving fish, moving angler, shifting light, and the fact that both the photographer and the person fishing are usually wet, cold, and focused on something other than composition.
That combination of constraints is what makes good fly fishing images genuinely difficult to produce, and what makes excellent ones so satisfying. If you’ve spent time on the Guides & Resources section of this site, you already know we spend a lot of time thinking about how to get more out of time on the water. Photography is one more dimension of that.
The other thing worth saying upfront: the images that actually communicate what fly fishing feels like rarely show a hero holding a fish. They show water. They show the cast mid-loop. They show the angler’s face focused downstream, reading something the camera can’t quite explain. Learning to see those moments is a skill independent of any camera or lens you own.
Understanding Light on Moving Water
Golden Hour and the Tailwater Reality
Photographers talk about golden hour like it’s the answer to everything, and on still water it often is. On moving water, especially high-clarity tailwaters like Cheesman Canyon or Eleven Mile Canyon, golden hour creates a different challenge: glare. The low-angle light that makes a meadow look beautiful hits the surface of a freestone at a usable angle, but on a flat, slow-moving tailwater pool it can wipe out any detail in the water entirely.
The practical fix is to pay attention to your position relative to the sun, not just the time of day. Shooting with the sun behind you or quartering from behind pushes the glare away from your lens. Shooting into the light gives you silhouettes, which can be intentional and powerful if you want mood rather than detail. Neither is wrong. Both require a decision, not an accident.
On tailwaters specifically, overcast days are underrated for photography. Colorado tailwaters in November, for instance, produce some of the best soft-light conditions I’ve seen, where the diffuse cloud cover eliminates glare and gives you even exposure across the entire frame from the angler’s waders to the foam line they’re working.
Polarizing Filters and What They Actually Do
A circular polarizing filter (CPL) is the single most useful optical tool for fly fishing photography, and it’s almost never discussed in beginner photography content. What it does, mechanically, is block specific wavelengths of reflected light. On water, that means cutting the surface glare and allowing the camera to see into the water column, sometimes dramatically.
Verified buyers of polarizing filters for outdoor/water photography consistently note two things: the filter works best when the sun is roughly 90 degrees to your shooting angle, and the effect is visible in real-time as you rotate the filter. You’ll see the glare cut in and out as you turn it. That visual feedback is useful on the water because it lets you confirm the filter is actually working before you commit to a composition.
CPLs also cut some light transmission, roughly one to two stops depending on the filter quality. On a bright Colorado afternoon that’s rarely a problem. In low-light conditions on a shaded canyon stream, you may need to bump ISO or open your aperture to compensate. This is basic camera physics, not a product flaw.
Composition Principles That Work on the Water
The Rule of Thirds and Where to Break It
Composition rules exist to be understood before they’re ignored. The rule of thirds, placing your primary subject at one of the four intersection points of a 3x3 grid, works in fly fishing photography the same way it works everywhere else. An angler centered in the frame reads as flat and static. An angler placed in the left third with the river stretching to the right reads as engaged with a landscape.
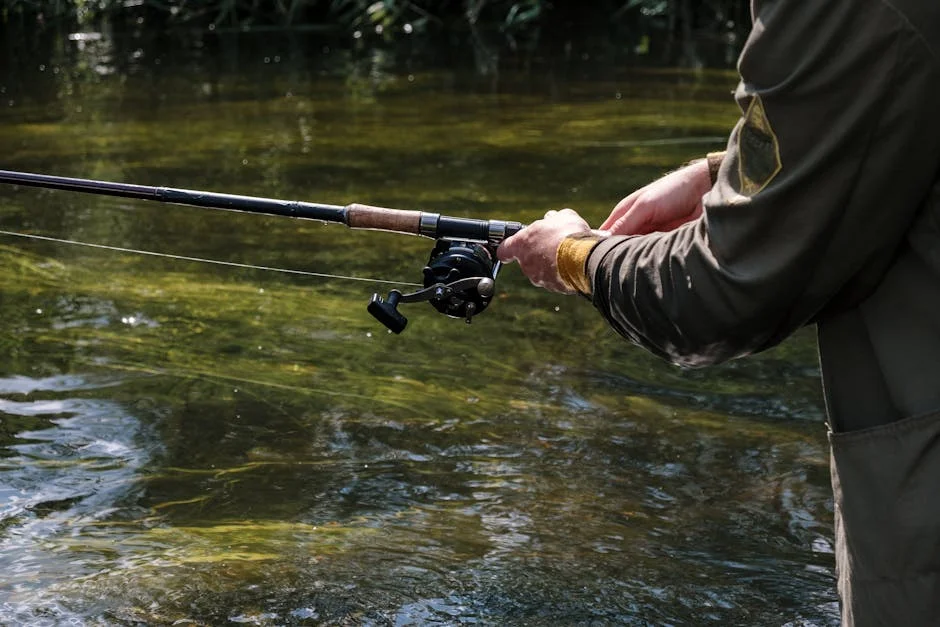
Where the rule of thirds breaks down in fly fishing images is when the water itself is the subject. Some of the best fly fishing photos are tight on the hands, or the net, or the trout’s coloring in a shallow riffle. At that point the grid is largely irrelevant and what matters is what’s sharp, what’s soft, and what’s in the frame that doesn’t need to be there.
Field reports from serious fly fishing photographers consistently point to one underused composition technique: shooting from the water surface level rather than from a standing position. Getting the lens down to water level, even six inches off the surface, changes the relationship between the angler and the water entirely. It’s uncomfortable to execute, especially in waders, but the resulting images tend to look like nothing else.
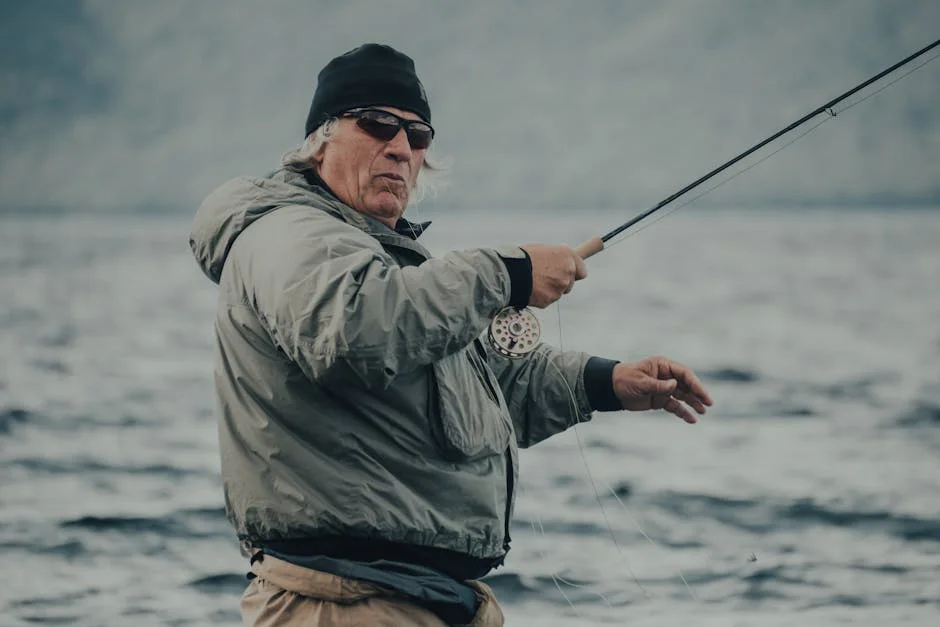
Timing the Cast
The cast is the central visual event in fly fishing photography and also the hardest thing to time correctly. Owner reviews and community discussions in photography forums oriented toward outdoor sports consistently point to the same mistake: shooting the back cast when the forward cast is where the line loads most dramatically.
The moment of maximum rod bend on the forward stroke, sometimes called the “loop unrolling” phase, is the frame most people are trying to capture and the one that requires either a fast burst mode or a really good understanding of the angler’s casting rhythm. Spending a few minutes watching before shooting lets you internalize that rhythm. Most experienced casters are more consistent than they realize, and if you watch three or four casts before you start shooting, you’ll start to anticipate the moment rather than react to it.
There’s also a strong argument for the presentation moment, the instant the fly settles on the water, as an alternative to the cast itself. It’s lower drama visually but it captures something real about what the angler is actually focused on.
Fish Handling and Ethical Photography
This section matters more than most people give it credit for. The growing conversation in fly fishing communities about fish handling during photography is legitimate and worth taking seriously.
The core principle is simple: the fish’s welfare comes before the image. That means minimizing air time, keeping hands wet before handling, and not contorting the fish into an unnatural position for a “better” shot. Most experienced catch-and-release anglers already know this, but the pressure to get a good photo can override judgment in the moment.
Field reports from guides on high-pressure tailwaters like the South Platte consistently note that fish handling during photography has improved significantly in the last decade, partly because of educational pressure and partly because social media has made poor handling visible. That visibility cuts both ways: bad handling gets called out, but so does a beautifully executed in-the-water release shot that shows the fish healthy and oriented correctly.
The in-water shot, where the trout is photographed in the net or partially submerged in the angler’s hands with just the head clear, has become the standard for ethical fly fishing photography. It’s also genuinely a more interesting image in a lot of cases, because the water around the fish becomes part of the composition.
Gear Considerations for the Water
Camera choice for fly fishing photography comes down to one primary constraint: it will get wet. Whether you’re shooting from the bank, wading wet, or leaning over from a drift boat, moisture is a constant factor. That means weather sealing is not a nice-to-have feature. It’s the baseline.
Mirrorless bodies with weather sealing, like the Sony A7 series or the Olympus/OM System micro four-thirds lineup, have become the working standard for anglers who take photography seriously without going full professional. Smartphone photography has also improved dramatically, and modern flagship phones with computational photography can produce usable fly fishing images in good light, especially at wide angles.
The lens question usually comes down to a 24-70mm equivalent zoom for most fishing situations, with a longer option (70-200mm equivalent) useful when you want to compress the background or photograph an angler from the far bank without wading into the scene. Prime lenses produce better optical quality but less flexibility, which is a genuine trade-off on the water where repositioning isn’t always possible.
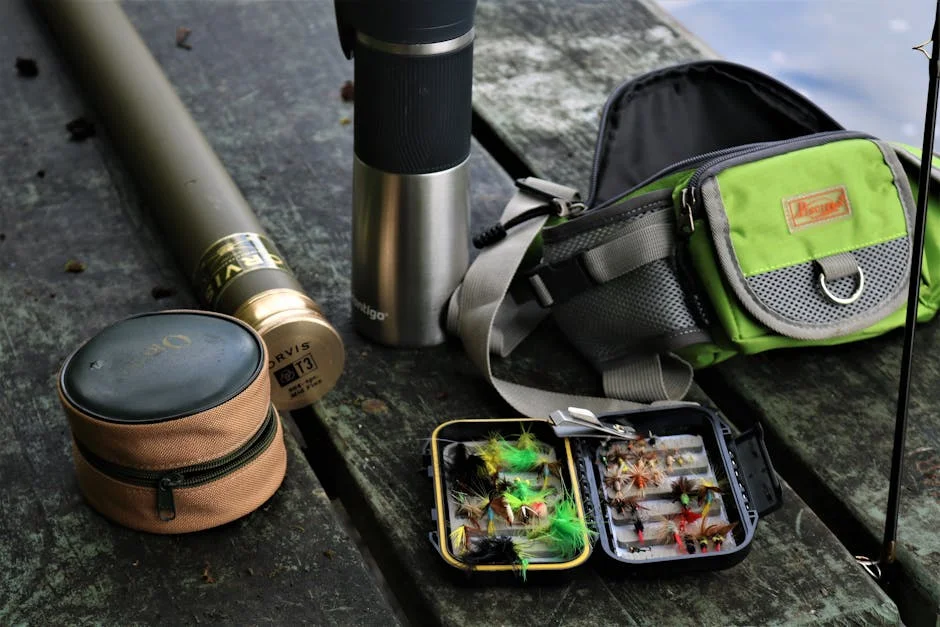
Dry bags and waterproof cases are worth mentioning because they’re usually ignored until something gets ruined. Several fly fishing-specific bags now include dedicated camera compartments. The Fishpond lineup, which I use for my own pack setup, offers chest pack configurations that accommodate a mirrorless body reasonably well alongside tackle. Whatever system you use, test it on a low-stakes day before you trust it on a day that matters.
Top Picks: Books That Will Change How You See the Water
Visual education matters in fly fishing photography the same way it matters in any visual skill. Looking at excellent images teaches your eye what to look for before you ever raise a camera. These two books belong in the library of anyone serious about fly fishing and photography together.
Flywater: Fly-Fishing Rivers of the West
Flywater: Fly-Fishing Rivers of the West is, at its core, a landscape photography book about the rivers of the American West. But what it does for fly fishing photographers specifically is show how experienced photographers think about water as a visual subject. The rivers profiled in this book, many of them waters that serious anglers fish or aspire to fish, are photographed with an attention to light, season, and composition that functions as a masterclass in visual thinking about moving water.
Verified buyers in the fly fishing community consistently describe this as the kind of book that lives on a coffee table but actually gets read, returned to, and used as reference when planning trips. Spec data on the physical product shows a large-format layout, which means the images are reproduced at a scale where you can actually study technique. If you’re trying to train your eye to see western rivers as photographic subjects, owner reviews suggest this is the most useful single visual reference available.
The text is useful too, describing rivers with the kind of firsthand knowledge that resonates with anglers, but the photography carries the book and carries it well. This sits in the mid-range price band, which makes it an easy recommendation relative to what it delivers.
Check current price on Amazon.
Fifty Places to Fly Fish Before You Die
Fifty Places to Fly Fish Before You Die works differently from Flywater. Where Flywater is primarily a visual document, this is a destination guide that uses photography as supporting content rather than the central argument. The photography throughout is excellent and intentionally varied across locations, which makes it genuinely useful for understanding how different water types and environments require different photographic approaches.
Verified buyers note that the writing is done through interviews with well-known anglers and guides associated with each location, which gives the place descriptions a grounded authority that pure travel writing rarely achieves. From a photography standpoint, the book functions as a reference for what fifty important fly fishing destinations actually look like across seasons and conditions. If you’re planning a trip to the Bighorn or the Madison or New Zealand’s South Island, the photography in this book gives you a visual vocabulary for those waters before you arrive.
The mid-range price point makes this accessible, and field reports from fly fishing travelers describe it as one of the more useful trip-planning resources available because it combines destination context with visual reference. The list of fifty destinations spans international waters, so the photographic range is genuinely broad.
Check current price on Amazon.
Buying Guide: Building a Fly Fishing Photography Setup
Start With Protection, Not Resolution
The most common mistake anglers make building a fly fishing photography kit is prioritizing image quality over durability. A high-resolution sensor in a camera body that isn’t weather-sealed is less useful on the water than a lower-resolution body that can handle the conditions. For resources that help prioritize your overall fishing-related gear decisions, the Guides & Resources section covers a range of accessory decisions in the same practical framework.
Budget-tier waterproof point-and-shoot cameras have improved significantly in the past several years and produce usable images in good light conditions. Mid-range mirrorless bodies with weather sealing represent the current value center of gravity for serious photographers who fish. Premium and luxury bodies offer faster autofocus, better low-light performance, and more refined handling, but the marginal improvement over a well-chosen mid-range option is genuinely small in most fly fishing shooting conditions.
Autofocus Performance for Moving Subjects
Fly fishing photography frequently requires tracking a moving subject, whether that’s a mid-cast rod or a fish in the net. Autofocus performance, specifically subject-tracking autofocus, has become a meaningful differentiator between camera systems. Field reports from wildlife photographers who also fish note that eye-detect and subject-tracking modes developed for wildlife photography translate directly to the fly fishing context.
Older autofocus systems, particularly those relying on contrast-detection only, struggle with the combination of a moving subject against a moving, reflective background. Modern phase-detection systems handle this substantially better. Spec data across current mirrorless systems shows that mid-range and premium bodies have largely closed the autofocus gap that previously required professional-level spending to address.
Lenses, Focal Length, and the Wading Constraint
Wading in a river is a constraint that most photography advice ignores. You cannot freely reposition. Moving five feet upstream to improve your angle might put you in chest-deep water. That physical constraint pushes toward zoom lenses over primes for fly fishing photography, because flexibility of focal length compensates for limited ability to change physical position.
A 24-70mm equivalent covers the majority of fly fishing situations. The wide end handles environmental portraits and water landscape shots; the longer end handles tighter compositions of the angler, net work, or fish. If you add one lens beyond a standard zoom, field reports from fly fishing photographers consistently favor a telephoto in the 70-200mm equivalent range for shooting from the bank when you want to compress background or avoid disturbing the water by wading into the frame.
Accessories Worth Carrying
A CPL filter, as discussed above, belongs in any fly fishing photography kit. Beyond that, the accessories most consistently recommended by experienced outdoor photographers in field reports include a microfiber cloth (for lens moisture), a small waterproof dry bag or case for camera storage between shots, and a wearable camera strap or clip system that keeps the camera accessible without requiring a bag to be opened and closed repeatedly.
Tripods are almost never practical for wading fly fishing photography, but a small Gorilla-style flexible mount can be useful on the bank for self-timer shots or long exposures of water at dawn. Budget-tier options in the flexible mount category are widely reviewed and rated consistently with premium options for this specific use case, which is worth knowing before spending on a premium tripod system you won’t actually use in the field.
Closing Thoughts
Fly fishing photography rewards the same patience that makes someone a better angler. The urge to immediately shoot everything is the same urge that makes a beginning angler start casting before they’ve read the water. Slowing down, watching first, and understanding what you’re actually trying to document produces better results in both cases.
I think about it the same way I think about hiring a guide when you already know how to fish. The guide on the Bighorn in 2009 showed me things I’d been doing wrong for five years without realizing it because I thought I already had a working system. If you’re serious about improving your fly fishing photography, spending a day specifically watching an experienced outdoor photographer work in the field will do more than any camera upgrade. Find someone who shoots water and movement well, watch how they position, how they anticipate, and what they ignore. The education is worth more than the gear.
For more resources on building skills and knowledge around the water, the Guides & Resources section covers technique, gear, and approach across the full range of fly fishing topics.
Frequently Asked Questions
What camera settings work best for fly fishing photography?
A fast shutter speed, generally 1/500th of a second or faster, is the baseline for freezing the motion of a cast or a fish in the net. Aperture-priority mode works well in consistent light conditions, letting the camera manage exposure while you control depth of field through aperture selection. Burst mode dramatically improves your odds of catching the exact moment of a forward cast or a fish coming to the surface. In low light, boosting ISO to maintain shutter speed is usually the right trade-off.
Do I need a waterproof camera or is a case good enough?
Both approaches work, but they represent different trade-offs. A purpose-built waterproof point-and-shoot is simpler to manage on the water and less stressful if it gets splashed or dropped in a shallow riffle. A weather-sealed mirrorless body in a quality case gives you significantly better image quality and more control, but requires more care. Field reports from anglers who fish regularly and photograph seriously tend to favor the weather-sealed mirrorless option once they’ve committed to photography as a serious part of their time on the water.
How do I photograph fish without harming them?
Keep the fish in or very close to the water for any photography. Wet your hands before handling, minimize the time the fish is out of the water to a few seconds at most, and support the fish horizontally rather than gripping by the jaw alone. In-water shots, where the fish is photographed partially or fully submerged, are both more ethical and increasingly the aesthetic standard in fly fishing communities. If the fish is struggling or showing signs of stress, skip the photo and focus on a clean release.
Is a smartphone good enough for fly fishing photography?
In good light conditions, modern flagship smartphones produce genuinely usable fly fishing images, particularly at wider focal lengths. The primary limitations are optical zoom quality at distance, autofocus performance on fast-moving subjects, and the absence of a polarizing filter option (some clip-on CPL adapters exist but receive inconsistent reviews). For social media use and casual documentation, a smartphone is more than adequate. For images you want to print large or use commercially, a dedicated camera system produces noticeably better results.
What’s the best way to learn fly fishing photography quickly?
Looking at excellent fly fishing and water photography consistently, in books, in print publications, and in curated online galleries, builds visual vocabulary faster than most people expect. Understanding basic exposure concepts (aperture, shutter speed, ISO) gives you the technical foundation to control results rather than rely on luck. Shooting in the field regularly, even on days when conditions aren’t ideal, accelerates skill development. Many experienced fly fishing photographers also point to studying wildlife photography technique, since the challenges of moving subjects against variable backgrounds translate directly.
<script type="application/ld+json">
{
 "@context": "https://schema.org",
 "@type": "FAQPage",
 "mainEntity": [
 {
 "@type": "Question",
 "name": "What camera settings work best for fly fishing photography?",
 "acceptedAnswer": {
 "@type": "Answer",
 "text": "A fast shutter speed, generally 1/500th of a second or faster, is the baseline for freezing the motion of a cast or a fish in the net. Aperture-priority mode works well in consistent light conditions, letting the camera manage exposure while you control depth of field through aperture selection. Burst mode dramatically improves your odds of catching the exact moment of a forward cast or a fish coming to the surface. In low light, boosting ISO to maintain shutter speed is usually the right trade-off."
 }
 },
 {
 "@type": "Question",
 "name": "Do I need a waterproof camera or is a case good enough?",
 "acceptedAnswer": {
 "@type": "Answer",
 "text": "Both approaches work, but they represent different trade-offs. A purpose-built waterproof point-and-shoot is simpler to manage on the water and less stressful if it gets splashed or dropped in a shallow riffle. A weather-sealed mirrorless body in a quality case gives you significantly better image quality and more control, but requires more care. Field reports from anglers who fish regularly and photograph seriously tend to favor the weather-sealed mirrorless option once they've committed to photography as a serious part of their time on the water."
 }
 },
 {
 "@type": "Question",
 "name": "How do I photograph fish without harming them?",
 "acceptedAnswer": {
 "@type": "Answer",
 "text": "Keep the fish in or very close to the water for any photography. Wet your hands before handling, minimize the time the fish is out of the water to a few seconds at most, and support the fish horizontally rather than gripping by the jaw alone. In-water shots, where the fish is photographed partially or fully submerged, are both more ethical and increasingly the aesthetic standard in fly fishing communities. If the fish is struggling or showing signs of stress, skip the photo and focus on a clean release."
 }
 },
 {
 "@type": "Question",
 "name": "Is a smartphone good enough for fly fishing photography?",
 "acceptedAnswer": {
 "@type": "Answer",
 "text": "In good light conditions, modern flagship smartphones produce genuinely usable fly fishing images, particularly at wider focal lengths. The primary limitations are optical zoom quality at distance, autofocus performance on fast-moving subjects, and the absence of a polarizing filter option (some clip-on CPL adapters exist but receive inconsistent reviews). For social media use and casual documentation, a smartphone is more than adequate. For images you want to print large or use commercially, a dedicated camera system produces noticeably better results."
 }
 },
 {
 "@type": "Question",
 "name": "What's the best way to learn fly fishing photography quickly?",
 "acceptedAnswer": {
 "@type": "Answer",
 "text": "Looking at excellent fly fishing and water photography consistently, in books, in print publications, and in curated online galleries, builds visual vocabulary faster than most people expect. Understanding basic exposure concepts (aperture, shutter speed, ISO) gives you the technical foundation to control results rather than rely on luck. Shooting in the field regularly, even on days when conditions aren't ideal, accelerates skill development. Many experienced fly fishing photographers also point to studying wildlife photography technique, since the challenges of moving subjects against variable backgrounds translate directly."
 }
 }
 ]
}
</script>Where to Buy
Flywater: Fly-Fishing Rivers of the WestSee Flywater: Fly-Fishing Rivers of the West on Amazon