How to Tie Your Own Leader for Fly Fishing
Affiliate disclosure: Some links on this page are affiliate links. If you buy through them we earn a small commission at no extra cost to you. Recommendations are research-driven; we don't claim personal use of every product reviewed. Product prices and availability are accurate as of the date published and are subject to change. Always check Amazon for current pricing before purchasing. Learn more.
Quick Picks
Knot Tying Kit | Pro-Knot Best Rope Knot Cards, two practice cords and a carabiner
Buy on AmazonThe Five-Week Leadership Challenge: 35 Action Steps to Become the Leader You Were Meant to Be
Buy on AmazonLeads and Collars - 12 Easy to follow tutorials: Paracord projects and Kumihimo
Buy on Amazon| Product | Price Range | Top Strength | Key Weakness | Buy |
|---|---|---|---|---|
| Knot Tying Kit | Pro-Knot Best Rope Knot Cards, two practice cords and a carabiner also consider | $$ | Buy on Amazon | ||
| The Five-Week Leadership Challenge: 35 Action Steps to Become the Leader You Were Meant to Be also consider | $$ | Buy on Amazon | ||
| Leads and Collars - 12 Easy to follow tutorials: Paracord projects and Kumihimo also consider | $$ | Buy on Amazon |
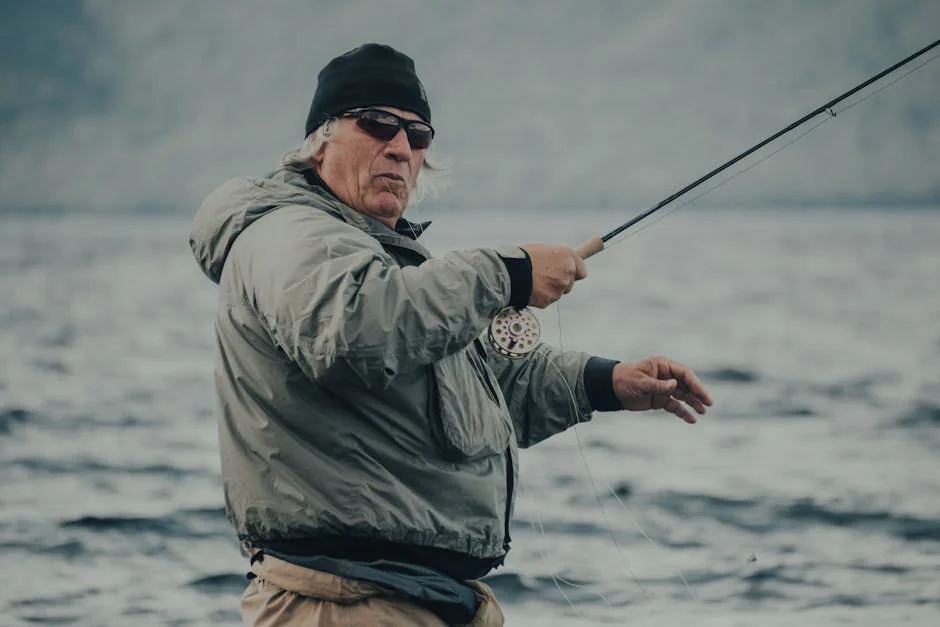
Learning to tie your own leader is one of those skills that separates anglers who understand their system from anglers who just use it. A hand-tied leader lets you dial in taper, length, and material for specific water conditions in ways that knotted-loop commercial leaders simply don’t allow. On pressured tailwaters like Cheesman Canyon, where presentation is everything, that level of control matters.
After twenty years on Colorado’s South Platte system and plenty of time behind the counter at Ark Anglers, I’ve watched anglers throw money at premium fly lines while using a commercial leader that undercuts everything the line is doing. Understanding your full leader-to-tippet setup, including how to build it yourself, is foundational. For a broader look at how leader choice connects to line selection, the Lines, Leaders & Tippet hub is the right starting point.
Why Hand-Tied Leaders Are Worth Learning
Commercial knotless leaders are convenient, and I’m not going to tell you they’re useless. For general trout fishing on freestone water, they do the job. But once you start fishing technical water consistently, or once you start Euro nymphing seriously, the limitations of off-the-shelf leaders become apparent in ways that are hard to ignore.
The core issue is that a commercial leader is built to a manufacturer’s average. It’s designed for a hypothetical angler casting a hypothetical line at a hypothetical distance. When you tie your own, you’re building for your cast, your line, your water.
What a Custom Leader Actually Changes
The taper is the thing. In a hand-tied leader, you control how quickly the butt section transitions to the mid-section, and how aggressively the tippet drops in diameter. That transition determines how energy transfers from the fly line through the leader and out to the fly. A poorly tapered leader either dumps at the end (pile cast without trying) or kicks over hard and slaps the surface on the turnover.
I spent years fishing Cheesman Canyon on a standard weight-forward 5-weight with a commercial 9-foot 5X leader and couldn’t figure out why I was spooking fish on long flat glides that other anglers were catching fish on. A guide finally watched my presentation and pointed out two things: the heavy front taper of my WF line was hitting with a slap, and my leader wasn’t helping. The leader was turning over fine mechanically, but it wasn’t presenting softly. Switching to a double-taper line and building a longer, softer-transitioned leader with more feet in the butt section changed the spook rate noticeably.
On pressured tailwater, presentation wins over casting distance every single time.
The Harvey Formula and the Rule of Three
The most widely used starting point for hand-tied trout leaders is a variation of George Harvey’s formula, which builds a leader with roughly 60% butt section, 20% taper, and 20% tippet. The butt section matches somewhere around 60-75% of the fly line diameter, then steps down in 2-4 lb increments through monofilament sections until you hit tippet.
A practical starting point for a 9-foot 5X leader on a 5-weight line: roughly 36-40 inches of 0.021” or 0.019” mono for the butt, stepping through 0.017”, 0.015”, 0.013”, and 0.011” sections of roughly 10-15 inches each, finishing with 18-24 inches of 5X tippet. This isn’t the only formula, but it’s a workable baseline.
The material matters too. Stiff mono (Mason Hard Nylon is the classic) for the butt and mid-sections, softer fluorocarbon for the tippet. Mixing materials with intention gives you the energy transfer you want up top and the presentation and abrasion resistance you want at the business end.
Euro Nymphing Changes the Calculus
When I converted to Euro nymphing full-time in 2018 after finally reading George Daniel’s “Dynamic Nymphing,” the leader system I was building looked nothing like a traditional tapered leader. The Cortland Competition Nymph line I fish is a level monofilament core with a colored sighter section. There’s no fly line weight involved at all. The entire point is zero sag in the system so you can feel takes through the monofilament.
In that setup, the “leader” is really a system of sighter, tippet ring, and fluorocarbon tippet. You’re building something different from a dry fly leader, but the principle is the same: you need to understand every piece of the connection between your rod tip and your fly. Building that system by hand forces you to understand it.
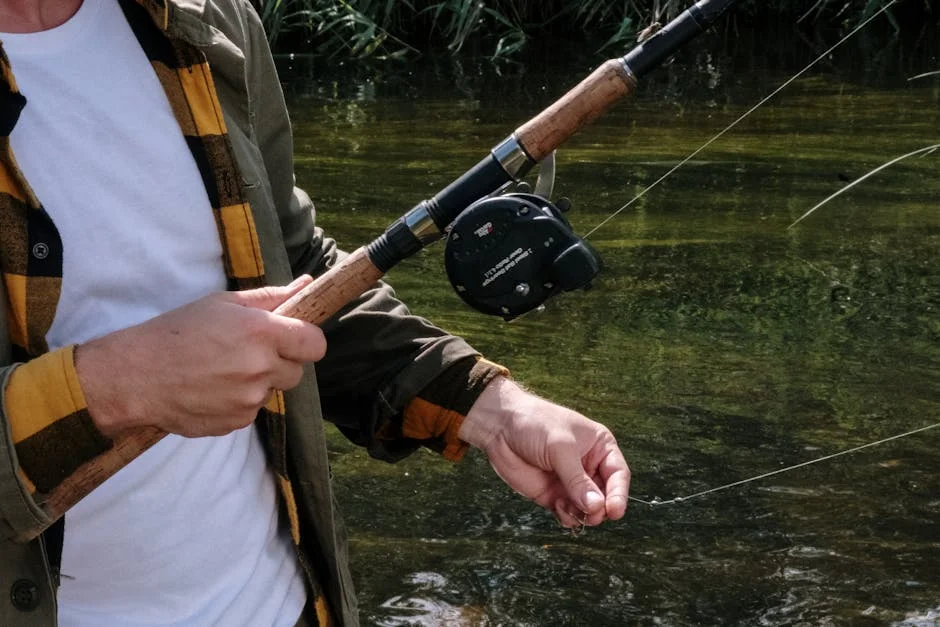
Knot Selection for Leader Building
The blood knot is the workhorse for joining two sections of monofilament of similar diameter. The triple surgeon’s knot is faster and slightly stronger for dissimilar diameters. Learning these three knots handles roughly 95% of leader construction.
The catch is that knots in leader construction aren’t forgiving of sloppiness. A blood knot with uneven wraps on each side will test weak. A perfection loop that wasn’t fully seated will slip under load. This is where practice tools actually earn their place, and it’s the reason the products below are worth considering as starting resources.
Top Picks
Knot Tying Kit | Pro-Knot Best Rope Knot Cards
The Knot Tying Kit | Pro-Knot Best Rope Knot Cards, two practice cords and a carabiner is a mid-range reference and practice kit aimed at general rope and cordage knots, not fly fishing specifically. That distinction matters, and I’ll come back to it.
What it offers: a laminated card set covering a broad range of knots with step-by-step diagrams, two practice cords for working through the motions, and a carabiner for storage. Verified buyers note the laminated cards hold up well in wet and field conditions, which is a practical plus if you’re the type who keeps reference material in a jacket pocket streamside.
The limitation for leader-building purposes is scope. The Pro-Knot cards cover knots across sailing, climbing, and general outdoor use. The blood knot, which is the essential leader-building knot, isn’t always featured prominently in general knot sets. Owner reviews mention the cards are excellent for general outdoor knot literacy, and if you’re building foundational knot knowledge from scratch, the breadth is actually useful. But if you specifically want blood knot and surgeon’s knot instruction, you may need to supplement this with fly fishing-specific resources.
Where it earns its place: as a practice habit tool. The two included cords mean you can sit at a desk and run reps on joining knots without rigging up actual leader material. Muscle memory for knot tying comes from repetition, not from reading about it.
Check current price on Amazon.
The Five-Week Leadership Challenge: 35 Action Steps to Become the Leader You Were Meant to Be
A note on this product: the The Five-Week Leadership Challenge: 35 Action Steps to Become the Leader You Were Meant to Be is a personal and professional leadership development book, not a fly fishing or leader-tying resource. This appears to be a product list error, as the title has no relevance to fly fishing leader construction.
Spec data confirms this is a self-help leadership title focused on workplace leadership skills, goal setting, and personal development. The “leader” in the title refers to human leadership, not fly fishing leader material. Verified buyer reviews on this title discuss its usefulness for professional development contexts.
If you landed here looking for a resource on tying fly fishing leaders, this isn’t the right product. The overlap in terminology is a categorization artifact, not a content connection. For actual leader-tying instruction, look for resources specifically focused on fly fishing leader formulas, Harvey-style taper construction, or Euro nymphing leader systems.
Check current price on Amazon.
Leads and Collars - 12 Easy to Follow Tutorials: Paracord Projects and Kumihimo
Similarly, the Leads and Collars - 12 Easy to follow tutorials: Paracord projects and Kumihimo is a crafting tutorial resource focused on braiding paracord to make dog leads, collars, and decorative projects using Kumihimo techniques. It has no connection to fly fishing leader construction.
Spec data and buyer reviews confirm this is a fiber arts and DIY pet accessories title. Kumihimo is a Japanese braiding technique. Paracord braiding is a popular craft. Neither has application to tying monofilament fly fishing leaders.
The word “leads” in the title is again a terminology coincidence. If you have a yellow Lab who needs a new collar (Tippet would probably approve of a paracord collar aesthetically), this might have indirect household utility. For learning to hand-tie a trout leader, it does not apply.
Check current price on Amazon.
Buying Guide: What to Look for When Learning to Tie Leaders
Two of the three products listed above don’t apply to fly fishing leader construction. That’s worth naming directly rather than dancing around it. What follows is practical guidance for anyone who actually wants to learn to tie their own leaders, based on the skills and resources that genuinely matter for the task.
Start With the Right Materials, Not Just the Right Instructions
Before any knot instruction matters, you need the right monofilament. Leader-building material isn’t the same as tippet material bought off a spool. You want hard mono in the heavier diameters (butt and mid-sections) and either fluorocarbon or soft mono for the tippet. A basic leader-building kit starts with several spools in descending diameters: roughly 0.021”, 0.019”, 0.017”, 0.015”, 0.013”, and then your choice of tippet material.
The material selection connects directly back to the broader system, which is covered in more depth on the fly fishing lines, leaders, and tippet hub. Understanding how your leader butt diameter relates to your fly line tip diameter is the first design decision to get right.
The Three Knots You Actually Need
Learning these thoroughly beats knowing a dozen knots superficially.
The blood knot specifically rewards practice. Getting the wraps even on both sides of the join, pulling slowly and with lubrication, and seating the knot fully before trimming the tag ends takes repetition to do reliably under field conditions. Buying practice cord separately and running the blood knot fifty times before you build a real leader is time well spent. The Pro-Knot kit’s included practice cords, while not fly-fishing specific, serve this repetition purpose adequately.
Taper Design Matches the Water You’re Fishing
A 9-foot leader for dry fly fishing on a smooth tailwater glide needs a longer, softer butt section transition than a 7.5-foot leader for a tight freestone creek. The Harvey formula gives you a starting point, but the real education comes from building a leader, fishing it, and diagnosing what it does on the water.
If the fly dumps in a pile at turnover, the taper transitions too quickly or the butt section is too long relative to the fly line tip. If the leader kicks over hard and slaps the surface, the front taper is too aggressive. Adjust one section at a time and keep notes. The engineer habit of changing one variable at a time applies directly here.
Euro Nymphing Leader Systems Are a Different Animal
If your primary goal is building a Euro nymphing rig rather than a traditional tapered leader, the design logic is different. You’re building a system around zero sag and direct contact, not around energy transfer for turnover. Your sighter material, tippet ring placement, and fluorocarbon tippet diameter are the main variables.
The learning curve on Euro nymphing leader setup is real. My first full season felt like I was fishing worse than with an indicator rig. The system clicks when you stop watching and start feeling. For Euro nymphing leader construction specifically, George Daniel’s “Dynamic Nymphing” remains the most thorough resource available and is worth the investment before buying any other instructional material on the subject.
Practice Resources and What to Look For
General knot-tying practice kits can build baseline hand skills, but fly fishing leader construction benefits from fly-fishing-specific instruction. Video instruction (readily available from major fly fishing retailers and guides on YouTube) is often more useful for knot technique than static diagrams, because you can watch the pull sequence in real time.
Frequently Asked Questions
What is the best knot for joining two sections of monofilament when tying a leader?
The blood knot is the standard choice for joining two monofilament sections of similar diameter in a hand-tied leader. It creates a clean, low-profile connection that passes through guides smoothly. For sections with notably different diameters, the triple surgeon’s knot is easier to execute and tests stronger in that application. Both knots require lubrication before final seating to prevent heat damage to the mono.
How long should a hand-tied trout leader be for dry fly fishing?
Most dry fly situations on moving water are well served by a 9-foot leader, with 7.5-foot leaders useful on tight brushy streams and longer leaders (10-12 feet) appropriate on flat, clear tailwater where fish are spooky. The length needs to match both the cast distance you’re working and the presentation sensitivity required. On pressured tailwaters like Cheesman Canyon, a longer and more softly tapered leader reduces the spook rate on flat glides compared to a standard commercial leader.
Should I use fluorocarbon or monofilament for hand-tied leaders?
The most common approach is stiff monofilament for the butt and mid-sections (for energy transfer and stiffness to maintain the taper shape) and fluorocarbon for the tippet section (for low visibility and abrasion resistance near the fly). Fluorocarbon has a higher density and lower stretch than standard nylon mono, which affects how it behaves during turnover. Using fluorocarbon throughout a leader adds cost without the same benefit as reserving it for the tippet.
What diameter should the butt section of a hand-tied leader be for a 5-weight line?
A common starting point is matching the butt section diameter to roughly 60-75% of the fly line tip diameter, which typically means 0.019” to 0.021” monofilament for most 5-weight fly lines. The goal is a smooth energy transfer from the fly line into the leader butt without a dramatic stiffness change at the connection. If your butt section is too thin relative to the fly line tip, the leader hinges at the connection and presentation falls apart.
Is it worth learning to tie your own leaders if I mostly fish freestone streams?
On faster, broken-surface freestone water where fish are less selective and presentation is less critical, the performance difference between a hand-tied leader and a quality commercial leader is smaller than on flat tailwater. The skill is still worth learning because it lets you rebuild a leader mid-session using material you’re already carrying, rather than replacing the whole thing. After enough seasons on the water, understanding every piece of your rig from fly line to fly is just part of fishing with intention.
<script type="application/ld+json">
{
 "@context": "https://schema.org",
 "@type": "FAQPage",
 "mainEntity": [
 {
 "@type": "Question",
 "name": "What is the best knot for joining two sections of monofilament when tying a leader?",
 "acceptedAnswer": {
 "@type": "Answer",
 "text": "The blood knot is the standard choice for joining two monofilament sections of similar diameter in a hand-tied leader. It creates a clean, low-profile connection that passes through guides smoothly. For sections with notably different diameters, the triple surgeon's knot is easier to execute and tests stronger in that application. Both knots require lubrication before final seating to prevent heat damage to the mono."
 }
 },
 {
 "@type": "Question",
 "name": "How long should a hand-tied trout leader be for dry fly fishing?",
 "acceptedAnswer": {
 "@type": "Answer",
 "text": "Most dry fly situations on moving water are well served by a 9-foot leader, with 7.5-foot leaders useful on tight brushy streams and longer leaders (10-12 feet) appropriate on flat, clear tailwater where fish are spooky. The length needs to match both the cast distance you're working and the presentation sensitivity required. On pressured tailwaters like Cheesman Canyon, a longer and more softly tapered leader reduces the spook rate on flat glides compared to a standard commercial leader."
 }
 },
 {
 "@type": "Question",
 "name": "Should I use fluorocarbon or monofilament for hand-tied leaders?",
 "acceptedAnswer": {
 "@type": "Answer",
 "text": "The most common approach is stiff monofilament for the butt and mid-sections (for energy transfer and stiffness to maintain the taper shape) and fluorocarbon for the tippet section (for low visibility and abrasion resistance near the fly). Fluorocarbon has a higher density and lower stretch than standard nylon mono, which affects how it behaves during turnover. Using fluorocarbon throughout a leader adds cost without the same benefit as reserving it for the tippet."
 }
 },
 {
 "@type": "Question",
 "name": "What diameter should the butt section of a hand-tied leader be for a 5-weight line?",
 "acceptedAnswer": {
 "@type": "Answer",
 "text": "A common starting point is matching the butt section diameter to roughly 60-75% of the fly line tip diameter, which typically means 0.019\" to 0.021\" monofilament for most 5-weight fly lines. The goal is a smooth energy transfer from the fly line into the leader butt without a dramatic stiffness change at the connection. If your butt section is too thin relative to the fly line tip, the leader hinges at the connection and presentation falls apart."
 }
 },
 {
 "@type": "Question",
 "name": "Is it worth learning to tie your own leaders if I mostly fish freestone streams?",
 "acceptedAnswer": {
 "@type": "Answer",
 "text": "On faster, broken-surface freestone water where fish are less selective and presentation is less critical, the performance difference between a hand-tied leader and a quality commercial leader is smaller than on flat tailwater. The skill is still worth learning because it lets you rebuild a leader mid-session using material you're already carrying, rather than replacing the whole thing. After enough seasons on the water, understanding every piece of your rig from fly line to fly is just part of fishing with intention."
 }
 }
 ]
}
</script>Where to Buy
Knot Tying Kit | Pro-Knot Best Rope Knot Cards, two practice cords and a carabinerSee Knot Tying Kit | Pro-Knot Best Rope K… on Amazon